Model Viewer DX-TRON
Overview
Starting with DX-Compiler v2.4.0, DX-TRON is deprecated and will be removed in a future release. No further feature updates or bug fixes are planned for DX-TRON. We recommend migrating to the new HTML graph viewer bundled with DX-COM (see Compilation Summary Report) for model inspection and visualization.
DX-TRON is a graphical visualization tool for exploring .dxnn model files compiled with the DEEPX toolchain.
It allows users to load and inspect model structures, view workload distribution between NPU and CPU through color-coded graphs. With DX-TRON, users can better understand model execution flow and improve overall performance.
Key Features
-
Support for .dxnn Files: Load and visualize model files compiled with the DEEPX toolchain.
-
Visual Workload Representation: Displays a color-coded breakdown of workload execution:
- Red: Operations executed on the NPU
- Purple: Operations executed on the CPU or host
-
Interactive Node Inspection : Double-click any node within the graph to view detailed information about the associated operations.
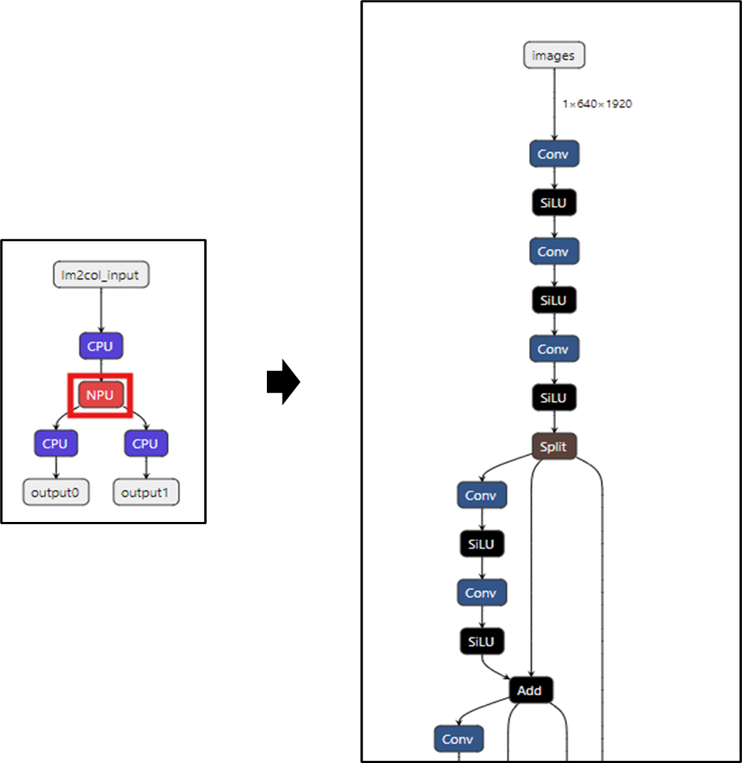
- Model Navigation Controls: Use the backward arrow in the bottom-left corner to return to the model overview screen at any time.
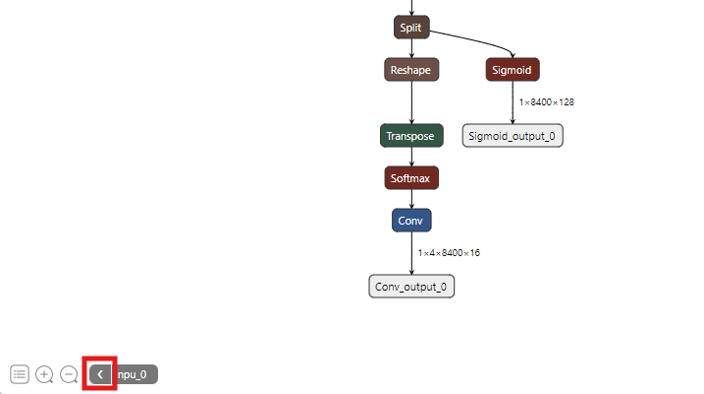
Download
DX-TRON can be downloaded from the DEEPX Developers' Portal:
https://developer.deepx.ai
Account registration and authentication are required to download DX-TRON packages.
For detailed installation instructions using the automated installation script, refer to the dx-all-suite installation guide.
Installation on Linux
Supported Systems
| Operating System | Versions | Architecture | Supported Mode |
|---|---|---|---|
| Ubuntu | 20.04, 22.04, 24.04, 26.04 | x86_64 (amd64), ARM64 (aarch64) | CLI/Desktop + Web |
| Debian | 11, 12, 13 | x86_64 (amd64), ARM64 (aarch64) | CLI/Desktop + Web |
| Fedora | 42, 43, 44, 45 | x86_64 (amd64), ARM64 (aarch64) | Web only |
| RHEL | 9, 10 | x86_64 (amd64), ARM64 (aarch64) | Web only |
| CentOS | 9, 10 | x86_64 (amd64), ARM64 (aarch64) | Web only |
On the Red Hat family (Fedora / RHEL / CentOS), only the DX-TRON web variant is installed. The dxtron CLI/desktop (AppImage) binary is supported on the Debian/Ubuntu family only. Launch the web server with ./run_dxtron_web.sh --port=8080.
DX-TRON can be installed using one of the following methods:
Method 1: Automated Installation using install.sh (Recommended)
The easiest way to install DX-TRON is using the automated installation script. This script will download the package from DEEPX Portal, extract files to the dx_tron/ directory, and install the Debian package automatically.
./install.sh --target=dx_tron --username=<your_email> --password=<your_password>
Method 2: Manual DEB Package Installation
If you have already downloaded the DX-TRON package, you can manually install the Debian package.
Step 1. Extract the Package
tar xfz dxtron_x.y.z.tar.gz
This will extract the following files:
dxtron_x.y.z_amd64.deb/dxtron_x.y.z_arm64.debdxtron_x.y.z_web/dxtron_x.y.z_amd64.AppImagedxtron_x.y.z_setup.exe
Step 2. Check Your System Architecture
dpkg --print-architecture # Returns: amd64 or arm64
Step 3. Install the DEB Package
# For x86_64 (amd64)
sudo apt-get install ./dxtron_x.y.z_amd64.deb

# For ARM64 (aarch64)
sudo apt-get install ./dxtron_x.y.z_arm64.deb
The DEB package automatically handles all required dependencies. No additional package installation is needed.
Method 3: AppImage (Portable)
AppImage is a portable executable that does not require system installation.
Step 1. Install Required Packages
DX-TRON AppImage requires several system libraries. Run the following command to install dependencies:
./scripts/install_prerequisites.sh
libfuse2 is mandatory for AppImage execution and may not be installed by default on Ubuntu 22.04 or later.
Step 2. Prepare the AppImage File
Make the AppImage executable:
chmod +x dxtron_x.y.z_amd64.AppImage
Step 3. Run DX-TRON
Execute the AppImage:
./dxtron_x.y.z_amd64.AppImage
Or use the convenience script:
./run_dxtron_appimage.sh

Once launched, a GUI window will appear, enabling DXNN model visualization.
Running DX-TRON with sudo may require the --no-sandbox flag, but this is not recommended for security reasons.
Installation on Windows
This section explains how to install and launch DX-TRON on Windows using the provided setup file.
Step 1. Installation File
- File Name:
DXTron Setup x.y.z.exe
Step 2. Installation Steps
- Save the provided .exe file to your PC.
- Double-click the file to launch the installer.
- When the User Account Control (UAC) prompt appears, click Yes.
- Follow the on-screen instructions in the installation wizard.
- After installation, a DX-TRON shortcut is created in the Start Menu and optionally on the Desktop.
The default installation path is as follows.
C:\Users\YourUsername\AppData\Local\Programs\DXTron\
Step 3. Launching DX-TRON
- Search for DX-TRON in the Start Menu and run it, or
- Double-click the Desktop shortcut (if created).
Running DX-TRON
DX-TRON can be run in two modes: Desktop GUI Mode and Web Server Mode.
Desktop GUI Mode
After DEB Package Installation (Linux)
Run DX-TRON using the dxtron command:
dxtron
Using AppImage (Linux)
Execute the AppImage file directly:
./dxtron_x.y.z_amd64.AppImage
Or use the convenience script:
./run_dxtron_appimage.sh
On Windows
Launch DX-TRON from the Start Menu or Desktop shortcut.
Web Server Mode (Linux Only)
DX-TRON can be run as a local web server, allowing you to access the model viewer through a web browser.
Basic Usage
./run_dxtron_web.sh
Then open your browser and navigate to: http://localhost:8080
Using a Different Port
./run_dxtron_web.sh --port=3000
Then access: http://localhost:3000
The web server mode requires the dxtron_x.y.z_web/ directory, which is created after running install.sh or extracting the downloaded package.
For additional options, run:
./run_dxtron_web.sh --help
Troubleshooting
Step 1. Security Warnings on Windows
If Microsoft Defender SmartScreen blocks the installer:
- Click More Info.
- Select Run Anyway to continue installation.
Step 2. Program Fails to Launch
Perform the following checks in order.
- Check AppImage Permission (Linux)
- Ensure the file is executable.
chmod +x dxtron_x.y.z_amd64.AppImage
- Verify Required Libraries (Linux)
- Confirm all dependencies are installed.
- Reinstall DX-TRON
- Uninstall and reinstall DX-TRON to ensure all files are properly installed.